Stay At Home Round Robin

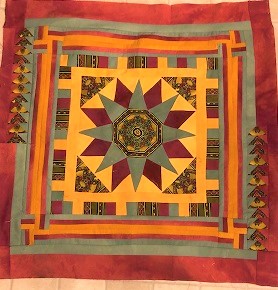
Our prompt this week was a wonky star. Years ago, I made a wall hanging with a wonky star. I thought that I had invented a new block, but now realize that there is nothing new in quilting. That wall hanging now belongs to one of my beloved daughter-in-laws. She loves it. It was fun to make. No matching or cut off points. Just twinkling stars.

If we did not like wonky, we could make any star pattern. The checkerboard row was busy, so I thought that the wonky star row should be coping strips with just a few stars in the corners.

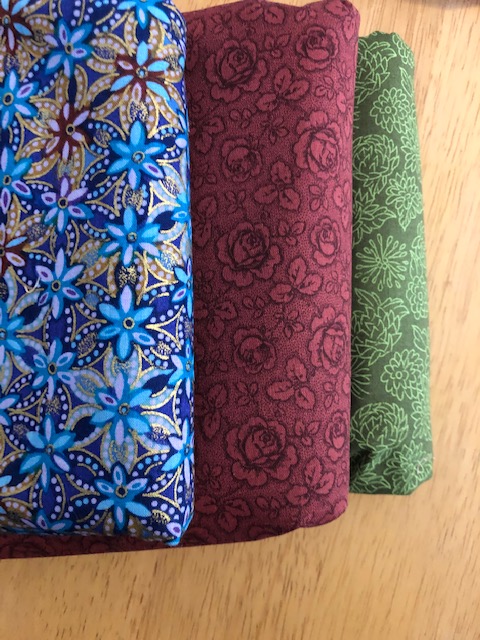
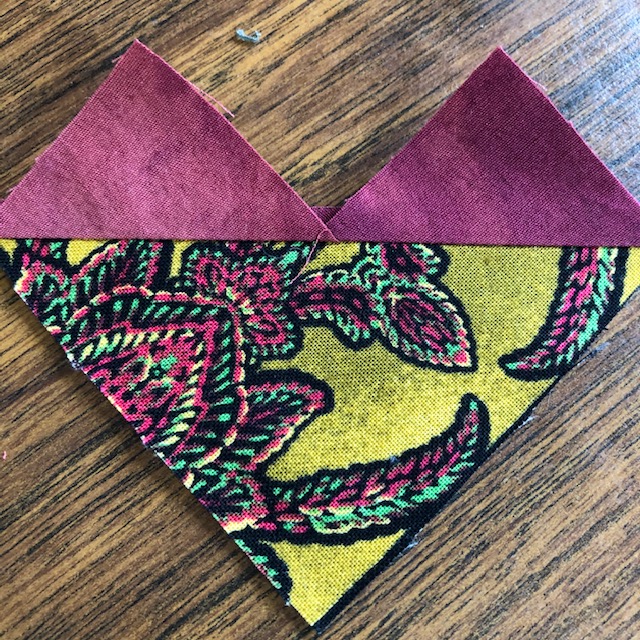
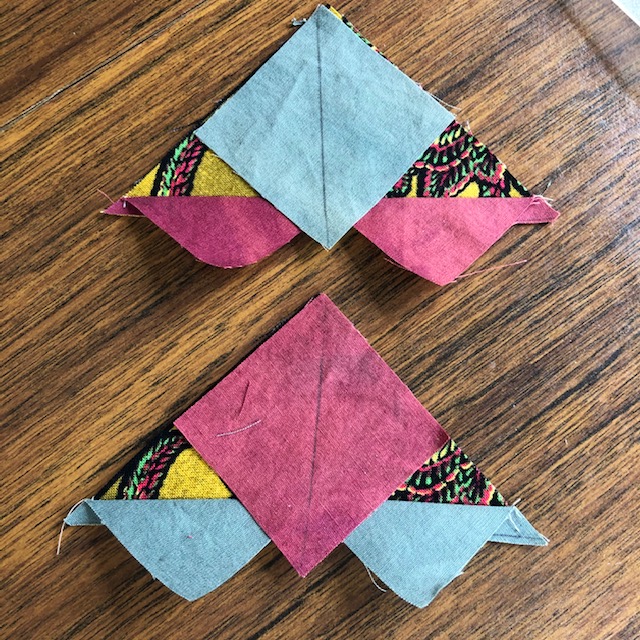
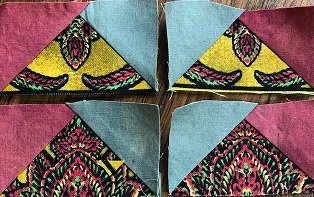
The colored SAHRR has just four stars, one in each of the corners. The wonky star is a nine patch. I wanted a narrow row so cut the patches 1 1/2″ square. That made a 3″ finished star. Running the pieces through assembly line method for the points was quick. I had Ginny Beyer fabric scraps leftover from the flying geese and the medallion center so used it for the points.

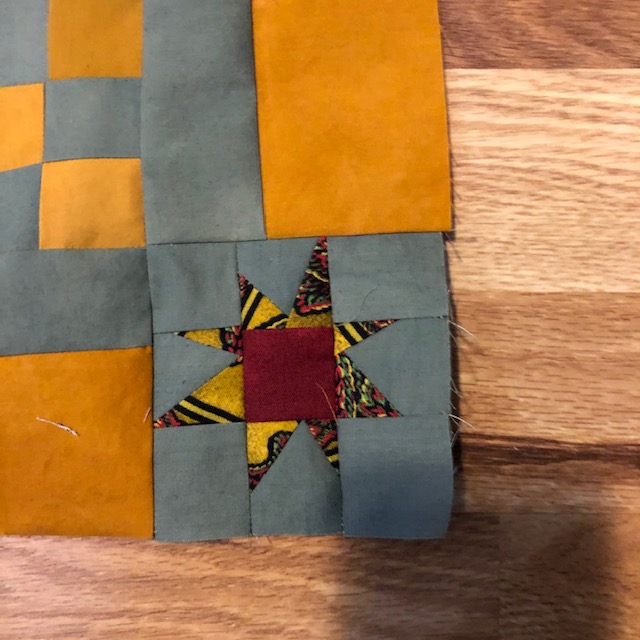
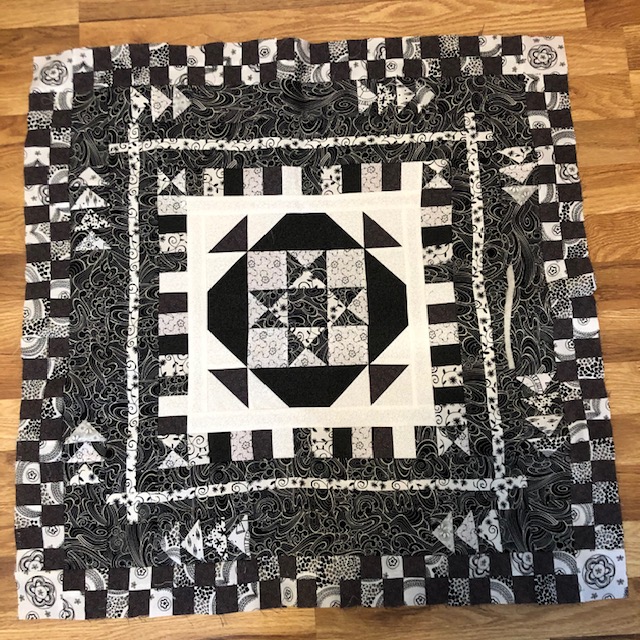
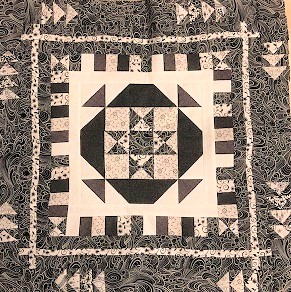
The black and white quilt is still is my favorite of the two. It is fun to just use value in choosing the fabric pieces. The fabric that I choose was too short to go the length of the row if I just had a star in each corner. I didn’t want to piece the length of the row. The corner of the previous row was 2″ not the 3″ measurement of the stars. It was time for a design element. The row would be 3″ wide so a 3″ star block would be fine in the corner. On each side of the star would be a 2″ x 3″ striped block. Then another star block. With all four corners made this way, I had enough length to piece the center of the border. That piece was strip pieced in the same configuration as the 2″ portion.

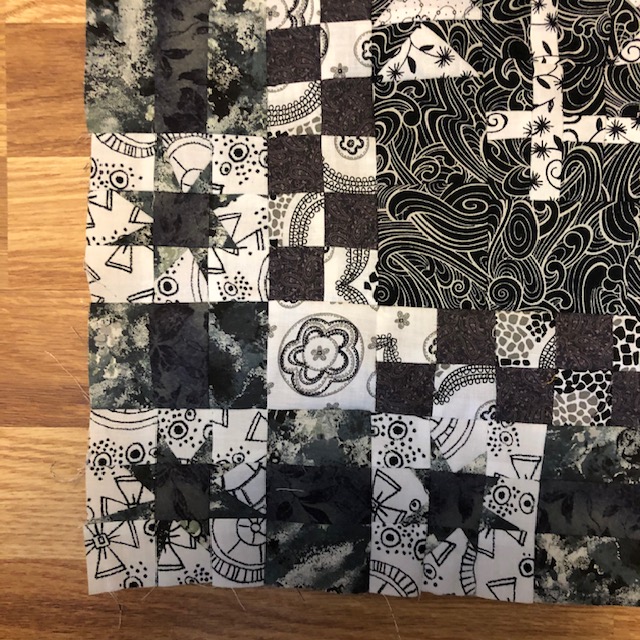
The 2″ flower block between the star blocks is a happy little accident. It looks as if it belongs there and I planned it.

I’m looking forward to the plan for the next row.

Now, It’s time to get some of the quilt thoughts out of my head and onto fabric. I have a lot of fun planned.

Have a great day and happy quilting.

Some things almost finished

This has been a productive week. The Morehead mystery quilt reveal came last Thursday. This quilt was easy to put together. It consisted of several A and B blocks and one C block. The only matching seams were the corners of the blocks. The Morehead Mystery is a very pretty quilt, but it doesn’t have a border. Several participants have said that they are going to add a border. I’m trying to decide if I will add one or not. I do have enough red, blue and green fabric to add a border. There is very small piece of white left over but I can’t remember where I bought it. I’ll have to do a bit of research to find it. If I had more white, I could piece a border. I don’t want it to look as if I just added a border because I could.

What do you think? Does it need a border?

The border could be one of these fabrics or a combination of them. Decisions, decisions!!! In the meantime, I’ll work on something else and just think about it.

On Wednesday morning, I realized that I hadn’t checked for the next row of the Stay At Home Round Robbin. The prompts come out on Mondays. This week, the prompt is a checkerboard. Checkerboards are fun to make.

Two 1 1/2″ fabric strips are sewn together. They are pressed, cut into 1 1/2″ segments and sewn back together with the colors reversed. This is the fabric that I used for the lighter part of the checkerboard.

When it was cut, it looked as if I had used multiple fabrics. I paired it with a darker fabric. When sewing the borders on the quilt, I found that I was one checkerboard short and all the darker fabric was used. It was time for a design element. With a bit of unsewing, and adding a solid piece to the middle of all four sides, it worked out. The corner squares were fussy cut from the center of the flowers .

The colored piece is a little larger than the black and white. I wanted a calming border so chose not to use the Ginny Beyer border fabric. The hand dyed fabric was Ombre dyed and gives subtle color tints and tones.

The Quilt Guild had a secret valentine exchange. Those who participated received a name with some background of another quilter. Each one either bought or made a gift for their secret Valentine. We had a wonderful exchange party. Three of us wore masks and social distanced. It was so good to have other people in the house, even if it was for a little time.

Absolutely beautifully made wall hanging from Adriana. It will be on my wall for the month of February.

From Teri

I received this in the mail from a very dear friend.

Happy Valentines Day.

Have a great day and happy quilting.

Stay At Home Round Robin

This week’s stay at home round robin was hosted by Anja Quilts. She chose a flying geese row. I like to make flying geese so this was fun.

I spent the better part of an afternoon trying to design a curvy flying geese. I wanted a narrow row, so this didn’t work. The curvy geese needed the space of a wider row.

There are several ways of making flying geese. One is to make a rectangle and sew small squares on the diagonal on each end. No specialty rulers are needed.

I have two flying geese rulers. When I want a single flying geese, I use Kimberly Einmos flying geese ruler. I used her ruler to make the Temperature quilt. For that quilt, I made one flying geese a day for 365 days. That was a fun quilt to make. One flying geese a day didn’t take long to make.

My other ruler is the Lazy Girl x 4 flying geese ruler.

You can make four flying geese at a time with this ruler. All the math is done for you. To make four flying geese, you cut one large square from the solid lines and four small squares from the dotted lines. The ruler makes several sizes of flying geese. I chose to make size B which finishes at 1″ x 2″.

I wondered what would happen if I fussy cut a large square from the Ginny Beyer border fabric. This was a “what if” that came out better than I expected. I’ll use this technique in another quilt someday.

You Tube has several tutorials on this method of making flying geese. The tutorials tell you to cut large and trim down. With the Lazy Girl, there is no trimming. With accurate cutting and sewing, the flying geese are the correct size. You do have to remember to divide the number of flying geese by four to get the amount of geese that you want. If you want twenty geese, you sew five. This is a fast and accurate method.

Draw a diagonal line on the small squares. Place two on the larger square as show in the picture and sew 1/4″ on each side.

Cut between the two sewn lines and press.

Add another small square with a diagonal line. Sew 1/4″ on each side of the line. I used two different fabrics because I wanted each side to be a different color.

When using two different fabrics, you will have a mirror image. This was perfect because I wanted the geese to fly up on opposite sides of the quilt.

The black and white geese were flying in no time. Both skies were the same color. I chose to have them fly around the corners of the quilt.

It’s different planning a quilt with just values, not tints and tones of colors.

It is fun to make two quilts using the same criteria.

I look forward to each Monday to have another prompt. It’s fun to see what the other quilters have done with the same prompts. Everyone has a different idea.

Deb Tucker also has a flying geese ruler, the Wing Clipper. The flying geese is made in the same manner as the Lazy Girl, but the block is made large and trimmed down.

Have a great day and happy quilting.