Amish Thistle – 1985

1985 was a good year. I was working outside the home and still had a few teenagers who hadn’t left the nest. The Quilters Newsletter was still in print. I had a subscription and enjoyed reading it. I had actually started my part time teaching career. Several of my coworkers gathered around my dining room table to learn how to quilt and we had fun.

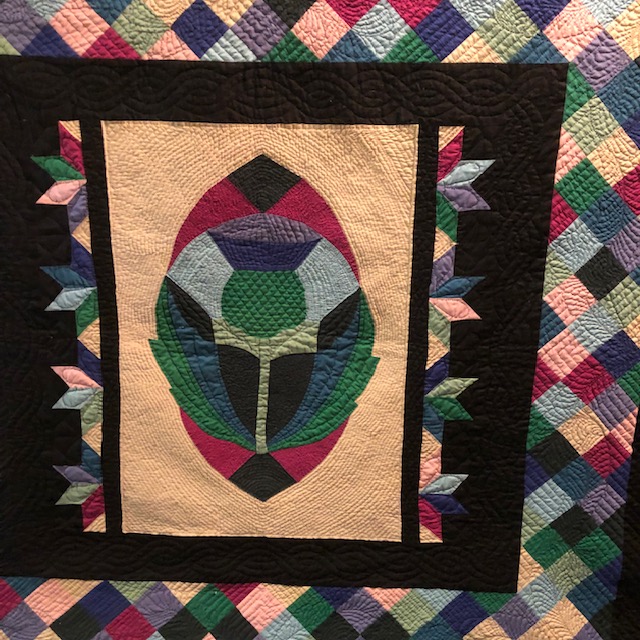
The March Quilters Newsletter came, and it had a wonderful picture of a thistle. The colors were what we considered Amish. It was beautiful and I had to make it in those colors. I enlarged it. It would be the center of my quilt.

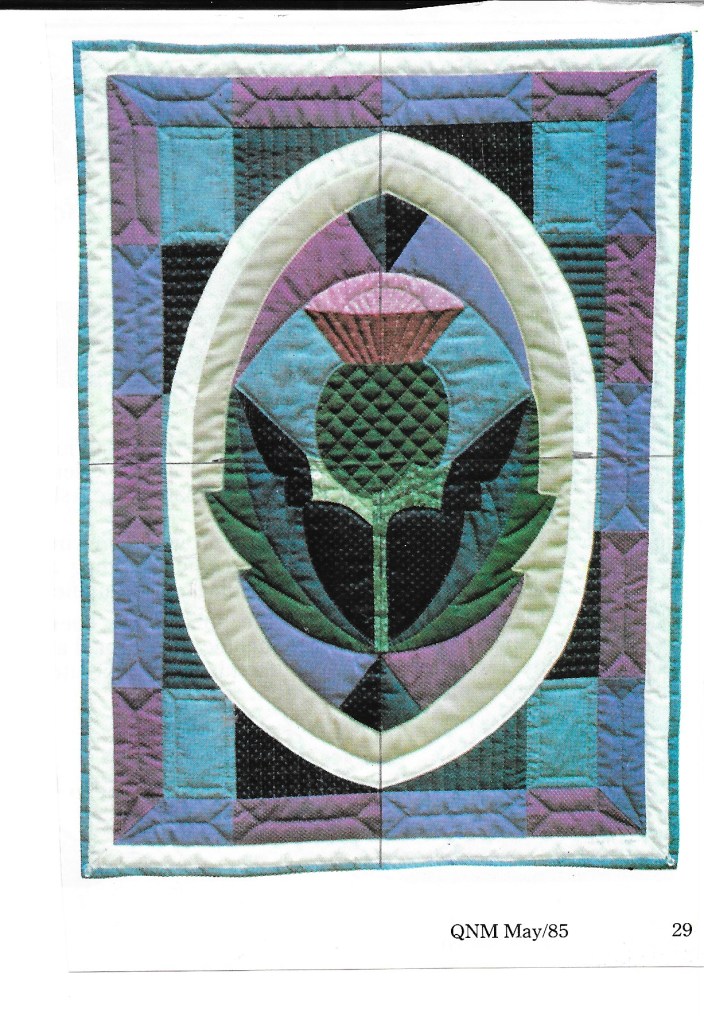
At that time, there were very few quilt books. My first book was Make a Medalion by Kathy Cook.

It would be the perfect setting for the Thistle.

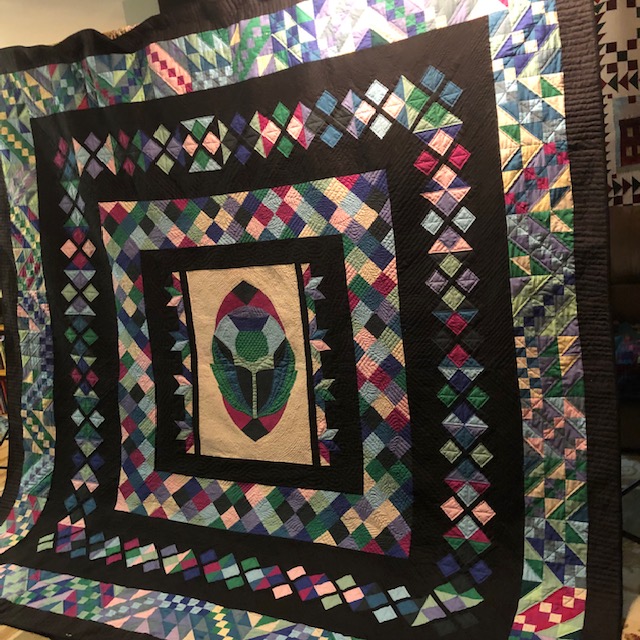
In 1985, all my quilts were hand quilted. I started quilting, and quilting, and quilting. This quilt is 107″ x 107″. It is big and heavy. More times than I can say, it was put aside to work on something else. Something that would be finished.

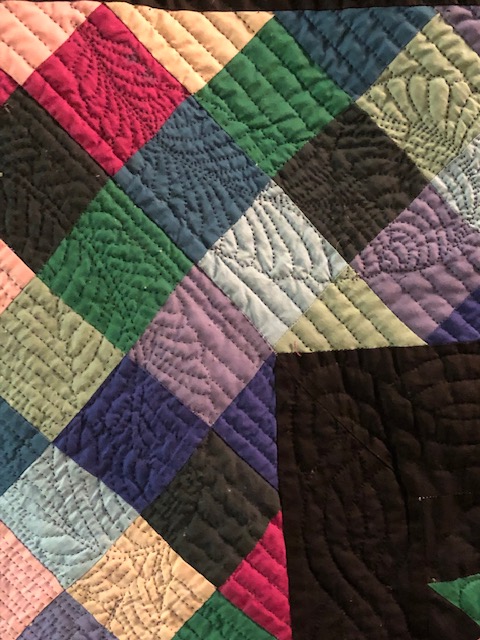
I don’t know why I decided to quilt feathers in a row that was so busy the feathers didn’t show.

It was hard to quilt black on black.

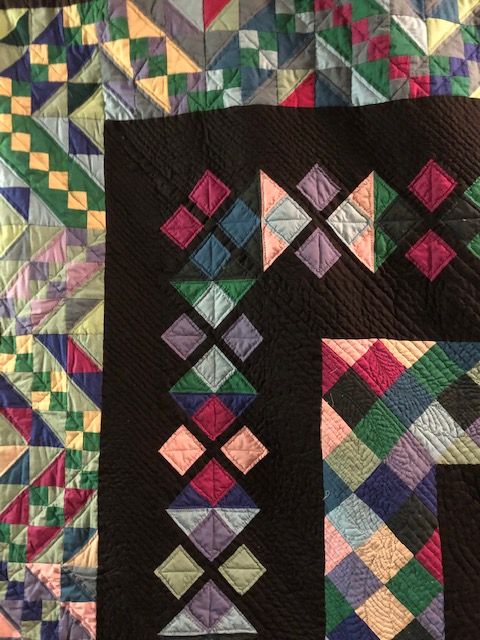
This fall, I decided to work on Amish Thistle until it was finished. 35 years is too long for a ufo. It seemed to take forever, but I was very happy when the last stitch was sewn. I will place it on my bed. The colors are perfect for that room. Miss Molly is ageing and can’t jump up on the bed anymore, so it will be safe. She has spent many evenings on the edges of Amish Thistle as I was quilting.

I still have some older ufos. A few are in the 15-to-20-year range. Most can be machine quilted, but some need to be hand quilted. Maybe my next hand quilted quilt will be a Dresden Plate. It was pieced and appliqued in the last 5 years. The plates are original to the 30’s. A friend gave them to me. The muslin for the squares was included. Her grandmother made them long ago. I found some 30’s fabric for the back, so all the fabric is original to the 30’s. There are a few that are left over and will make a wall hanging. Everything is basted and ready to go.

There are three bed quilts, including the Ugly Quilt, that are waiting to be machine quilted.

It’s time to quilt.

Have a great day and happy quilting.

More Dorset buttons

My garden hoses are ancient, stiff and very heavy. It was time to replace both of them. Amazon had a good buy, so I bought two, one for the back of the house and one for the front of the house. They arrived in the nicest packaging.

It looked to me like a small project bag. A friend had some clear plastic and shared some with me. I made the new bag a little wider and longer. It is perfect. The fabric is from my stash of Japanese Robert Kaufmann fabric. I made and added a Dorset button in the colors of the fabric. The Dorset buttons dress up a project. We had a Christmas Yankee swap at the mini group today and the bag has gone to a good home. I did leave a long thread tail on the button so that she can remove the button if she wants and add it to something else.

I have lots of clear plastic and plan to make more project bags. It’s a quick and easy project. I think that a Dorset button has to be part of the bag.

The program chair from the Guild had asked me to teach Dorset button making. I said that I would if enough members wanted to take a class. I needed something to display the buttons for the presentation. I decided on a small shadow wall hanging.

Make a package of backing, batting, and a white fabric. Three bright fabric pieces are stacked and cut into curved pieces with a rotary cutter. The cut pieces are laid one at a time on the white fabric in the same position as they were originally. Some of the spots are omitted with some of the white fabric showing. A lightweight piece of white fabric is placed over the bright fabric. Everything is pinned carefully. The seams are sewn with built in embroidery stitches. It’s o.k. if the intersections of the embroidery stitches are not pleasing. They can be covered with a button. There will be some curvy pieces left over.

I applied all of the buttons that I had made, even my first few buttons which were not very good. It’s a reminder of how far I’ve come.

An angel. I have a few beads with a hole large enough to be threaded with the tapestry needle. My next lesson will be how to attach beads that have small holes. The smaller beads will make a beautiful addition to the thread.

A Cartwheel button made with variegated thread with a white edging. I’m trying new techniques with each button.

This was supposed to be a butterfly. It would have looked better if the top strands were closer together and the wings were higher. It’s pretty but doesn’t look like a butterfly. I’ll try again sometime. Maybe it needs a bead for a head.

A Christmas wreath. It was made with cotton tapestry yarn, not DMC embroidery floss. It was quicker to make with the thicker yarn.

There were enough people who wanted to take a class. I have until April to improve my technique and be comfortable with teaching something that I had never heard of until a month ago. I am learning more with each button that I make.

I have taken a Zentangle class and absolutely love doing it. This was not bad for my first one. More classes will be held in January, and I will go. The Zentangles look like quilting patterns to me. After I learn a lot more, I want to figure out how to transfer Zentangle to quilting. I purposely did not go online to check out Zentangle. I wanted to go into the class with a clear mind and get my information from the teacher. Zentangle is now put away until January.

The Christmas wall hangings are up. I enjoyed making the house center in the December Miss Rosie quilt. It was fun to decorate the house and add all the embroideries.

Merry Christmas and a Happy new year.

Have a great day and happy quilting.