
I have been saving copies of quilt patterns that I think I might make some day, but probably won’t. Some quilts I see on the Internet, Pinterest or magazines. I could never make all the quilts that I would like to make. While cleaning out the files, I had an idea. When I find a quilt that I like, I could make one block from that quilt. If I used one fabric in each block along with colors from that fabric, I could have a sampler quilt. The blocks wouldn’t have to be the same size. The Moda Blockhead project is done and I have made all the Splendid Sampler blocks that I intend to make. I wouldn’t have a deadline to make a block before another arrived by e-mail. The scrap fabric drawers are overflowing. I could make this project with the fabric that I don’t choose when making a quilt.
 I found a yard of colorful floral fabric that I bought at Mardens. It has red, blue and yellow in it and is great for the focus fabric. I could add tints and tones from those colors. I also have a yard of beige fabric. I have several small pieces of shirting fabrics to use for the background. I seem to put the shirting aside when choosing fabric for a quilt. The bottom drawer has plaid fabric. I never put plaids in a quilt because I have to fussy cut them. Making one block at a time wouldn’t be that bad.
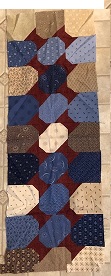
 The first block was found in Quilting Cubby. They have a lot of very interesting quilts on their website. This block has five nine patches set on point. The nine patches have triangles in each of the four corners. By using a different fabric in some of the triangles, a star appears. The four corners have just three pieces. Now that I’ve made one block, I don’t have to make the quilt.
One of my friend asked me why I haven’t given a recipe for a long while. Usually, I just check the refrigerator and make up something with the ingredients that are there. The recipes aren’t very interesting. I do like brown rice and make a batch in the rice cooker. On the day that I make the rice, I can cook dinner in about 20 minutes. After I start the rice in the rice cooker, I chop up vegetables. I use a combination of vegetables like cauliflower, carrots, broccoli, onions, brussel sprouts, or anything that is in the refrigerator. I place them on a cookie sheet that is sprayed with olive oil. Then I spray them with more olive oil and sprinkle them with onion salt. Cook at 400 degrees for about 20 minutes. I have a little five minute red copper chef cooker. I have cooked chicken, crab cakes, pork chops and other meat in it. The meat is cooked to perfection without effort. Everything should be ready at the same time.
Did you know that you can make hard boiled eggs in a rice cooker? I checked the Internet and it told of several different methods. I chose one to try and really like it. Wet a paper towel. Squeeze a little of the water out and place it in the bottom of the rice cooker. Add eggs. I used three. Plug in the cooker and cook for 15 minutes. Then turn the rice cooker to warm for 7 minutes. After the 7 minutes, immediately place the eggs in an ice water bath for 3 to 4 minutes. Don’t omit this step because the ice water prevents the green ring around the yoke. Roll the eggs on a flat surface and remove the shell. It will come off very easily. The eggs are perfect. It will be fun to see what other meals can be cooked in the rice cooker.


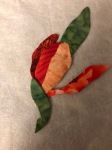
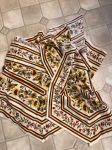 Eight years ago, I bought some sunflower fabric. I originally intended to finish the sunflower blocks of the month that I won at a Guild meeting. The fabric had stripes so I changed my mind and cut out some 60 degree triangle pieces. Then the fabric was put away. When I found the box of ufos in the attic, the partially finished pieces were there.
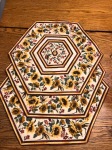 three table toppers
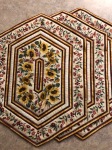 three place mats
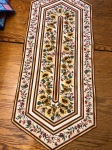 one table runner
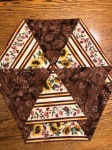 two table mats with a fabric addition because the prints were different.
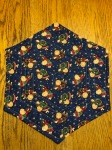 The sunflowers will be cheery in August and later on in the fall. Then I can flip them over as the background is a Christmas print. I was at a local Guild show in Maine and there was a table of fabric for sale. I bought yardage that would make a great table cloth and this was the coordinating fabric.
 The pattern for block # 52 arrived today. It was a quick and easy 6″ block and was quickly made and added to it’s place in the quilt.

 The quilt show is coming up soon. I still have one quilt to finish. The Five Yard International challenge quilt took much longer to quilt than I had planned. It is finally quilted. The binding is sewn on and partially tacked down. There are more than a few ends to knot and bury into the quilt. I’ll work on it tonight while watching TV. I will meet the deadline.
 Block # 50 is a 12″ block It’s called Vintage and is designed by Sherri McConnell of a Quilting Life.
 Block # 51 is a 6″ x 12″ block. It is called Power Star and is designed by Lisa Bongean of Primitive Gatherings. This one took a really long time to make. It had ninety six 1 1/4″ squares and a total of 141 very small pieces. The little squares made twelve 2″ x 1 1/4″ flying geese and eighteen 2″ x 2″ square in a square units. That’s a lot of little pieces for such a small block.
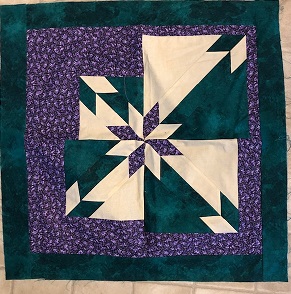


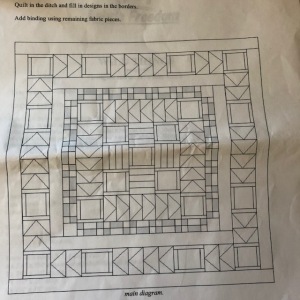
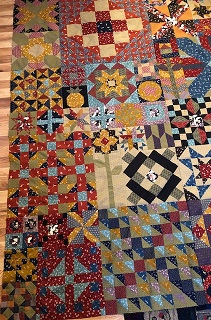
 The instructions have been filed in the round file. It’s not worth passing it on to a friend. It’s a bright, cheery quilt and will look very nice on my dining room table. The quilt pattern was designed for a fabric line. Apparently there were animal squares to use for the 3 1/2″ squares. The title is “Wild Things”. That’s appropriate.