
Dear Jane is one of the quilt projects that I brought to Maine with me this summer. I had intended to start in the center and make the blocks from the center out to the edge. I did this for a while, and actually made two rows. I am making the quilt in the potholder method. Each block is quilted and bound and then sewed to the next block. The quilt is finished as I make each block.
When I started the third row around the center, somehow all my plans disappeared. Instead of making just the blocks that were on the top of the second row, I finished Row D completely. The middle of Row D has been attached to the top of the second row. I also finished other random blocks. I have 58 blocks that are sewn, quilted and bound. I also have 9 additional blocks that are ready for hand sewing. Some need applique, some need quilting . and some are ready to bind.
I needed to reorganize myself so I decided to sew all of Row A. I printed the patterns and templates from the CD and chose the fabric so that I can complete that row while I’m in Maine. The Dear Jane blocks are made with different techniques. Tips for sewing the blocks are in the Dear Jane EQ CD. On rare occasion, I deviate from the instructions and make a block in my own method. It is easy to print a paper piecing pattern and sew. The tiny blocks come out perfect with paper piecing.
This week, I have made A1, A2, A5 and A6. A3 is an applique block and is in the hand quilting section of the project. A4 is paper pieced and is at the sewing machine to make tomorrow.
 A1is called Pinwheel Gone Awry. The center is a pinwheel, but the surrounding pieces look as if the pinwheel was broken.
 A2 is called One-Two-Buckle My Shoe. It was named because it was the 2nd block in row1, so after row 1 – block 2. Buckle My shoe just followed.
 A5 is called Cathie’s Camping. There was no information in the CD to tell who Cathie was or why she was camping.
 A6 is called Uncle Homer. The CD states that it was called that because Ruth used a piece of fabric in this block that had a farm on it and it reminded her of her Uncle Homer. I wondered who Ruth was. Brenda Papadakis, who wrote the Dear Jane book and drew all the patterns, listed all her quilting friends who made the Dear Jane quilts that were in the book. Ruth was not listed as one of her friends. She did mention Ruth Levin of the Bennington Museum. Maybe it was her. Although, it did not say that Ruth Levin made a Dear Jane quilt.
I’ll keep sewing Row A. When I take a trip to N. H. in June, I’ll print out the patterns for Row B and gather the fabric to make that row. Maybe, by the end of summer, I will have half of the quilt finished.
Have a great day and happy quilting.
 The sun is finally out after a long day of cold, drizzly weather. There has been a fire in the wood stove all day. Miss Molly has been sitting in the best seat in the house. She knows how to keep warm.
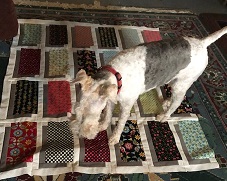

 The daffodils that are by the road have gone by, but the ones in the front yard waited for me to come up. They are a beautiful sign of spring. The gardens need a lot of cleaning out but that can wait until it is warmer,
 Of course, the dandelions are in full bloom as are the forsythia.


 It’s May and Annie Louise need a new outfit. This month, the inspiration comes from my great, great, great grandmother. She actually lived, at one time, in the city where I now live. I have seen her house which was within walking distance to her husband’s job. He was superintendent of the sewer department. The city has recently pulled up and replaced the sewer lines that he installed in the late 1800s.
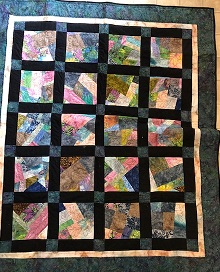
 Annie Louise’s quilt is back from the quilt show. Usually a dress is made and then a quilt is made from the scraps. This quilt was different. The quilt was made first. It was a Guild challenge. Then there was a lot of the blue fabric left over so Annie Louise has a house dress.


 The basket with just the pieces, after the strips, small pieces, and partially sewn Mile A Minute blocks were removed.


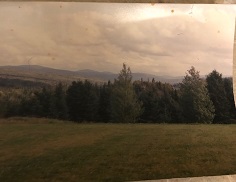
 This is a picture of the White Mountains in New Hampshire. We had many trips up North.
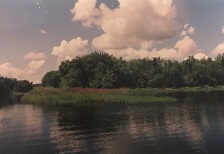 We fished many ponds and lakes, but one time we went up the Merrimack River. It was a beautiful ride. This bend of the river was very pretty. We didn’t catch any fish, but if we did, we would have let them go. Even though the Merrimack is cleaned up, I can still remember when it was polluted.
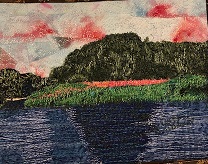
 For several years, we spent a week in Bradenton, Florida. Our motel was close to the beach and we walked the beach every day looking for shells. There was a restaurant close by and we were walking there the day that I saw this clump of grass.
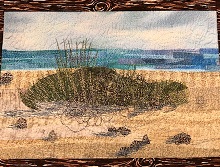
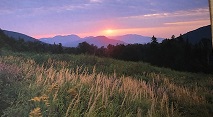
 Before we retired, we spent every Memorial Day and Labor Day at a cabin in Pittsburg, New Hampshire. The fishing was great and we went looking for moose every evening. They were by the side of the road every dusk. This was the scene across the road from our cabin.
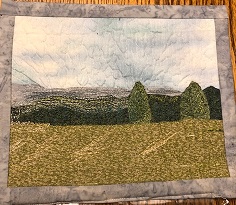
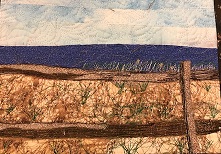
 This last one doesn’t have a picture with it. I probably had one at the time that I made the picture. This is the scene from my porch in Maine. The road goes from left to right at the top of the picture. My neighbors driveway is across the field just beyond the row of trees. There are gardens on both sides of the white picket fence. It must be fall, because the flowers are perennial Maximillian Sunflowers.