
I though that I had all my UFOs collected in one bin. I have enough to keep me busy for a whole year. But, I decided to do a Marie Kondo cleaning of my attic. The house was new when I moved here so everything that is in the attic was placed up there by me. It is time to purge.
So far, I have two trash bags full and a huge bag for the Salvation army. My criteria for getting rid of something is – do I really need it and will I ever use it. I started on the side that I call the sewing room annex. It has a lot of sewing stuff that I’ve collected for years. Most of the things in that part of the attic are in labeled bins so deciding what to do with it was easy. In reorganizing, I found several bins of mile a minute fabric. It is all together now. I will keep it as I’m teaching a Mile a Minute class in the fall and will give the fabric to my students. It will be all gone by October.
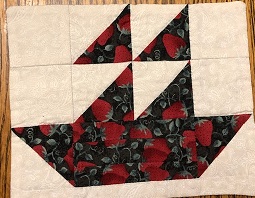
I did find one more box of UFOs and orphan blocks. There are several sets of blocks that are left over from quilts that are finished.  This one is left over from a quilt that I made in a Deb Tucker class.
There are four blocks with this coloration. They are left over from a Leah Day block of the month. I don’t know why I made extra blocks. There are twelve in the quilt that I finished. 
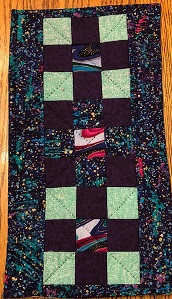
 This is one of a dozen table runners or table mats. Some are just the blocks, some are ready to be quilted.
This is my favorite cloth book. It needs to be pressed and the center sewn. Then it will be finished.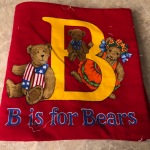
This is the only block that is left from a quilt that I made for my granddaughter, who is a gymnast. I don’t know what I will do with this single block, but I will think of something.

 A long time ago when one of my daughters lived in Utah, we exchanged blocks. We were going to make an alphabet quilt. Each of us would make two blocks for every other letter of the alphabet. I started with A. She would make a block beginning with B. The A block is called Autumn. I finished one block and have the pieces for the second. The block is only 6″ so the pieces are small. She never did make B and I didn’t make C. Maybe we could start again. It was a fun concept.
I found a plastic zipper bag with a partially made wall hanging. All the pieces are cut out and some are sewn together. The pattern is very confusing. It calls for 25 squares that have a border. The diagram has only 21 blocks like that. I’ll have to start from the first instruction and take it step by step.
I’m not in a hurry to finish the UFOs as most of them will go in the give away bin.
Have a great day and happy quilting.


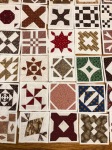 When I started making Dear Jane blocks, I intended to start in the center and work each row around the center block. Somehow, that plan has gone by the wayside and I am making blocks all over the quilt. About 1/4 of the blocks are finished so I have a long way to go to finish this quilt. I’m so glad that I decided to make the quilt in the pot holder method. That way, when the last block is made and attached to the body of the quilt, the quilt will be finished. All the remaining block patterns have been printed. Some of the blocks are very easy with just a few pieces. Others are much harder and need to be hand sewn. There are a lot of applique blocks. As soon as the Moda quilt is finished, the Dear Jane will be the only long term quilt to make. No more blocks of the week or the month for me this year. I have to many unfished quilts to finish.
 I designed the border of the Flower Quilt today. It was a lot of fun. I used the flower patterns that were in the body of the quilt. This is an unusual quilt as I decided the quilt size and designed the quilting pattern before I began. The flowers fell in place where they belonged. I’ll start appliqueing soon and show the progress from time to time.


 The applique on the center of the Flower Garden is finished. Or so I thought. It’s amazing what one can see in a picture. The right side is a little lower than the left. I think that I have to add some small leaves to even it out. That won’t take long. I just have to find the time to do it.


 The other students made a small piece with an apple tree, a basket and a wine bottle. I had already made that piece last year, so I was able to make a sweet pea piece. I was given a beautiful piece of hand dyed fabric to use for the sweet pea. It took a while to position the freezer paper pattern on the fabric. I wanted the lights and shadows to be in the right spot. I took two pictures of the pieces with different colorations and decided which one looked better.
 David has a CD that teaches how to quilt pictorial quilts. The CD is short, but it has a wealth of information. He quilts slowly on a Sweet Sixteen. All the instructions can be transferred to a domestic machine. When I started quilting I found it harder to forget my way of quilting than to quilt his way. David recommends using the stop and start button when quilting. I found that hard to do at first, but by the third petal, I was remembering to push the button to stop. After a little while, I really enjoyed quilting his way.
 He quilts with variegated thread. I have some, but not the right colors so had to use plain thread. The thread is the same in the top and bobbin. The quilting starts in the middle and works out to the sides. Each petal has to be completed before going on to the next one so there are many thread and bobbin changes within each petal. It was worth winding all the bobbins before I started. Every thread is pulled to the back, knotted, and buried between the layers. This seems to take longer but when you are done, the back doesn’t need to be cleaned up. The tension can also be checked on a regular basis.
 I found a few small quilts that I made several years ago. The teddy bear and the cat are applique with embellishments. I’m not sure why I didn’t quilt the background. They were made while I was still hand quilting everything and I probably didn’t think that they were worth quilting. It wouldn’t take much time to machine quilt the background and finish them. I’ll do that some day when I have nothing else to do. I could use them for free motion quilting practice.
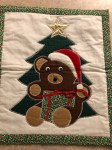


 The yoke has flat lace in the front. Gathered lace goes around the collar and down around the yoke.
 There are two rows of ruffles at the bottom.
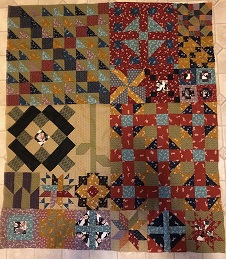
 6″ block
 16″ block


 The tenth little quilt is made of strips of all the leftover fabric. It is the only one that is quilted on the machine. It is 11″ x 15″.