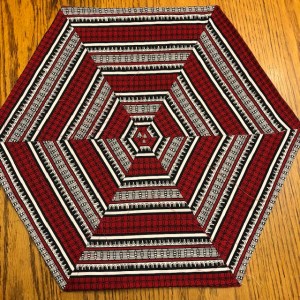
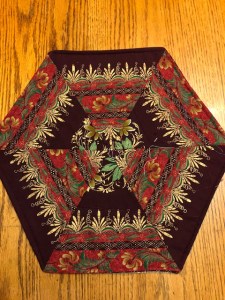
I was originally a self taught quilter. Over the years, I have had many teachers who taught me different ways to quilt. Some were very good and some not so good. I did learn something from each one, even though it might have been that I didn’t like to quilt the way that they did. Four people have had the most influence on my way of quilting.
Enjoyment – Doreen Speckman taught me to enjoy quilting. She was an awesome teacher. I remember her teaching in her bathing suit on a very hot day. We ignored the heat and laughed all the way through class.
Applique – I had several classes in applique. It wasn’t my passion, although I liked to do it. I went to as many applique classes as I could hoping the I would learn to enjoy the hand work. Nancy Pearson taught at the Vermont quilt Festival. She opened my eyes to color, technique and the love of applique. We learned how to make twisted ribbon. The piece that we made in her class was supposed to be a wall hanging, but I enlarged it and made a queen size bed quilt.
Stipple quilting – After I pieced and appliqued the quilt, I hand quilted it with a stippling technique taught by John Flynn. I called the quilt “Basket and Butterflies” because I quilted orange butterflies amongst the stippling. The sub title is “It’s John Flynn’s Fault”. Because I had made the quilt with techniques learned at Vermont, I submitted the quilt into the Vermont show. It was my first entry into a regional quilt show. It not only won a blue ribbon, but also won a ribbon for best hand quilting.
Piecing – The teachers who had the most influence in my piecing were Ann Gallo and Sue Rabin. The are amazing teachers. One would start a sentence and the other would finish it. It was like one person in two ladies. I learned so much from them. There way of flip and sew is different than anyone else. While in the class, we went into another area for a demonstration. I did not know at the time, but one of the ladies picked up my flip and sew piece on the way by to demonstrate how not to sew it. I had cut off both pieces. The following is their way. I always do it this way now.

The object is to have a small triangle on the corner of a larger square. You will use a large square and smaller squares for the corners. Draw a diagonal line on the back of the smaller square. Line the small square up with the corners and sew on the diagonal line.
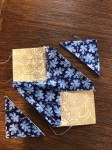
Most instructions tell you to cut the corners 1/4″ away from the sewn line and press the triangle out.
 Ann and Sue’s way is to cut the inner small square leaving the large square intact. No matter how accurate you sew, the triangle might be a little over or under the line. When you add this piece cut this way to another in the block, it will still be an accurate cut.

When these triangles were pressed back, they did not go to the edge of the larger square. If they were cut off the regular way, the piece would be too small.
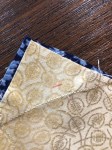
When these triangles were pressed back, they went beyond the edge of the larger square. The Piece would have been too large. Trim the overage and the piece will be the right size and be square. I learned so much from Ann and Sue. More tips will come at a later date.
Have a great day and happy quilting.
 Block 29 is a 6″ block. It is called Courthouse Step and was designed by Carrie Nelson. This was a quick block to make. There were only nine pieces and all straight sewing.
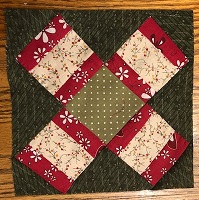
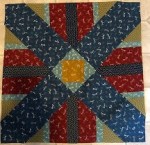 Block 30 is an 18″ block. It is called Gaudi and was designed by Brigitte Heitland of Zen Chic. This took a little longer to piece than block 29. The triangle pieces were pieced in strip sets and then trimmed to the triangle. The center was a square in a square unit. The measurements in the instructions were not right, but I was able to adjust and make the center unit the right size. It called for 2″ squares to flip and sew on a 3 1/2″ base, when it meant to add triangles to all four sides of the center 3 1/2″ square. If I had followed the instructions, the center would have finished at 3 1/2″square. It needed to be 4 3/4″ which is the same size as the ends of the larger cross pieces.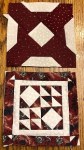
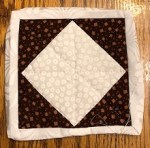
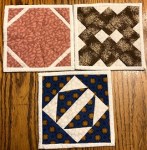

 A friend gave me some Dresden Plate blocks that were made in the 30’s or 40’s. They came with the muslin. I have appliqued the blocks onto the muslin and stitched the blocks together.
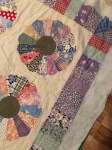 Fortunately, I had several 30’s Dresden Plates pieces that I purchased at auction several years ago. I was able to cut them to make the border. The fabric, even though it isn’t the same patterns, has the same look. It goes very well with the blocks.
 I bought a piece of green 30’s fabric from a vendor at the Guild quilt show, intending to use it for something else. It just happens to be the right size for the back of this quilt. I think that I was going to use it with the auction Dresden Plate pieces. They’re both in this quilt now so I don’t have to think of what to do with them.
 I’m using a Linus quilt for the demo. It is made with nine patch blocks set three by four. I made two sections of two rows. The nine patches are quilted. I omitted quilting the sashing because I needed it to float. I also didn’t quilt the border because The quilting might not match up where it was seamed. I wanted to quilt it all at once. Most tutorials tell you to trim both edges even. This will work, but you sometimes have to pull it and the seam won’t lay flat. I find it better to make one edge 1/4″ wider to give a little wiggle room. It is less stressful. On this quilt, the side with the sashing will be the side that is longer. It was not quilted. That will give you more room to manipulate. It is the bottom piece in the picture.
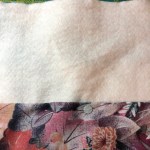 Turn the bottom piece with the sashing over. Pin the backing down and away from the edge. This will keep it out of the way of trimming. Turn back over and trim even with the edge.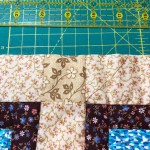
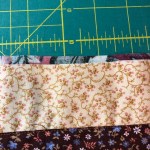 Unpin the back, smooth out, and trim back 1/4″ away from trimmed top.
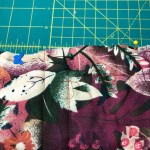 Pin backing down again to get it out of the way. Pin the two pieces together, right sides together. I use a lot of pins. Line up the sashing lines while pinning. Peek to see if they line up.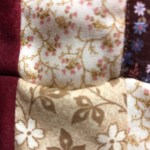
 Then sew seam with a 1/4″ seam.
 Take it to an ironing board. Laying it with top against the board, press seam up. Press 1/4″ on backing.
 When it is even, pin and then hand tack seam.
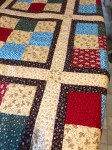 Done. You will not know that the quilt was quilted in small pieces. Using this technique, you can machine a king size quilt without a lot of tugging. You could even quilt single blocks and put them together this way. A patterned backing will hide the seams on the back. Or you could use different fabrics on the back and have a two sided quilt. There are so many options.
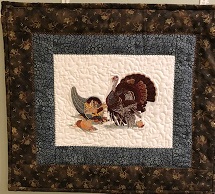 It’s November already. I finally changed the small monthly wall hanging. I hadn’t changed it since July. Sue didn’t go out trick or treating. She can today.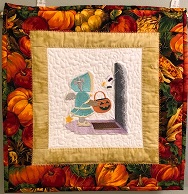
 When I was getting the wall hanging out of the drawer, I found another one. This was made for a Guild challenge many years ago. I’m not sure what the criteria was for the challenge, but I remember that we were given beads to use in the piece. It was hand quilted. The fabric was obtained at a Guild quilt show. Keepsake Quilting was a vendor at the show. They had a large bin of fabric. We could stuff a plastic shopping bag for a very small price. I knew that I would use the fabric some day when I bought it. It seems as if I have a lot of fabric that I bought that way. Some day, I will have a use for it.

 October is almost done. It will be November tomorrow. The Temperature Quilt is complete up to the end of October. Just two more months to go and it will go to the long arm quilter. The colors are beginning to look like the ones that I used in the Spring months. When the winter colors are added, it should be very pleasing to the eye.


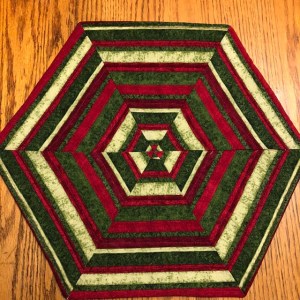 I like to make striped table runners that have the ends cut so they come to a point, There are triangles left over from the cutting and they make little hexagon table mats. Four sets of triangles were in the UFO bin and I finished them today. I don’t have the runners so I must have given them away. The triangles sometimes are different but as long as they are color coordinated, they are pretty. These will go in the give away bin.