A little while back, one of my daughters came to my house for a visit. I brought out the “give away” bin and she chose a piece. I mentioned that I was working on another piece and it was going into the “give away” bin. When she saw it, she folded up the piece that she had chosen and put it back into the bin. She said “I’ll wait for that one.” I had intended to work on it right away, but other projects kept getting in the way.
 The wall hanging is made of hand and commercial dyed fabrics and a few other fabrics that went with it. I machine quilted it with free motion quilting, even feed quilting and ruler quilting. It is not quite finished because the binding is in N. H. I have sewed the frame on the inside of the pink last border. When the binding is sewn on, I will sew another frame and then quilt something between the frames. It shouldn’t take too long to finish.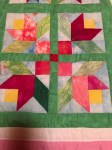
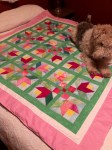 Miss Molly is examining the quilt.
What I have learned about ruler work.
It should be done on a flat bed machine with enough space in the front and back to hold the ruler tight. My machine is slanted on the front and has very little space in the back to hold the ruler.
The table should be at an ergonomic height. Your arms and hands should be at a comfortable angle. My dining room table is too tall and it is tiring to use the ruler.
The spot where the needle ends should be marked. The needle sews 1/4″ away from the edge of the ruler. It would be easier if you had a target to aim for.
The lighting should be good, so you can see where the ruler is behind the presser foot.
Ruler work is not enjoyable. Maybe, when I get back to my sewing room in N. H. and all of the above items are corrected, I will enjoy the process better. I haven’t sewn beyond a straight seam yet. The books make it sound so easy.
I enjoy free motion quilting very much. Many of my quilts have been free motion quilted.
I have seen some tutorials from Leah Day about even feed foot quilting. That sounds interesting. She has a book with three quilts and all the instructions. There are tutorials about all the processes including selecting fabric, processing the fabric before cutting and many more.
There is always something new to try when you quilt.
Have a great day and happy quilting.

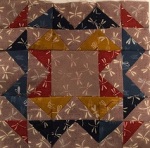 Block #23 is Broken Windows by Jo Morton. It consists of half square triangles and flying geese. I just realized that the flying geese are inserted backwards. I’ll unsew this block and resew it the correct way. Or maybe, I’ll just make another block correctly and have two blocks. This isn’t a mistake. It’s a design element. I may like this one better.
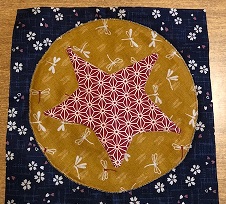 The Moda Block, Circle and Star by Jan Patix is finished, I made it using a technique that I learned from David Taylor. The block was invisible machine appliqued using Gypsy paper on the back of the fabric for stabilizer. The edge was turned under with spray starch which was sprayed into a dish and applied with a q-tip. When pressed, it makes a sharp seam to stitch with a blanket stitch.
 The Simple Sampler block, Cat Nap by Nicole Ves Van Auezathe was supposed to be hand embroidered. It represents a cat taking a nap on a quilt. I read Kat Tucker’s blog and she made hers with free motion quilting and embroidery. It was much easier. The cat was supposed to be black, but I only know yellow cats so free motion quilted my cat yellow. I used leftover pieces of fused fabric. I keep all leftover fused fabric is a separate baggie so that I won’t use it by mistake when I think that the color is just what I need.
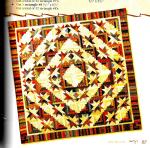 Carrie ‘s blocks are brown, orange, yellow, and a few spots of green and blue.
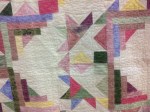 My blocks were in the pastel spring colors. I quilted it with my domestic machine.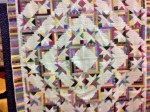


 I did enjoy the class, but decided that working small wasn’t what I really wanted to do. This is the piece that I made with the quarter square triangle finishing at 1/4″ It’s hardly visible. It is in the right block, bottom row. A four patch finished at 1/4″ is in the left block.
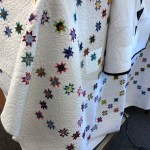 This is Lynn’s queen quilt made with 3″ stars. It is absolutely stunning.
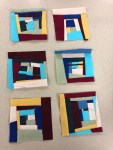 We were taught to improvise with tiny left over strips. These are my blocks.
 Lynn’s blocks are amazing. She uses every last scrap of fabric. I think that if one started to make blocks with small pieces on a regular basis, they could be made up quickly. It might be interesting to make one or two after sewing a regular size quilt. They would add up quicker than you might think.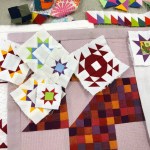
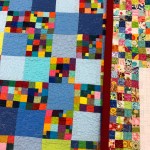
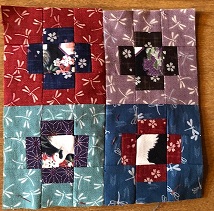 Block 22 in the Moda Blockhead block of the week project uses small pieces. There are four 3″ blocks within a 6″ block. It uses 1 1/2″ squares for the corners and centers of the 3″ blocks. They finish at 1″. The other four pieces consist of two 1 1/2″ x 1 ” rectangles sewn together. All four of the little blocks have different colors. In the original pattern, the center block was the same color as the rectangles that were closest to them. They looked like a cross in the middle of the block. I chose to use a coordinating print fabric in all of the center squares. This block might change my mind about piecing with small pieces. It is very pretty and easy to piece. I can imagine a whole quilt with this block in different colors with the center piece all the same fabric. Now, when I cut leftover fabric scraps into precuts, I will cut smaller than 2 1/2″ and go down to 1 1/2″. It would take a lot of squares to make a full size quilt.
 This was an easy one. I cut the center to size. Then I added oversized borders and corner squares, which I then cut down to size. The four triangles were cut to size and bordered with white strips that were wider than they needed to be. They were added to the four sides of the center square. When I trimmed the block to 5″. the white borders became the right size. I fussy cut the basket weave fabric so that the weave would go in one direction. It is quilted and ready to bind.
 This was a little more difficult. I cut the center to size. Then I paper pieced the borders with the triangle. The red triangle was placed on the paper first and then the white was added to both sides. The borders are mitered. I pressed this seam open as the little corner pieces were appliqued over the mitered seam. The paper piecing made this unit perfect and I was able to add them with ease. It also is quilted and ready to bind.
 Two weeks ago the Simple Sampler block was designed by Carl Hentsch. It is paper pieced. The block is named Betty’s Bloom. Betty is one of Carl’s older dogs.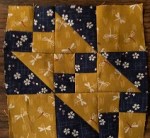
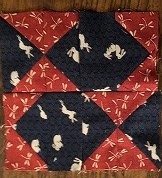
 I have finished 25 of the 169 center blocks of the Dear Jane quilt. That is not counting the border triangles, but I will think about them when I finish all 13 X 13 rows of the center. Each block is hand quilted and bound in the pot holder method. Then they are sewn together. I’m really addicted to making this quilt even though I once said that I would never make a Dear Jane.
 I have also finished a small embroidered wall hanging. I embroidered a Donna Dewberry pattern. Her embroideries look similar to her painting. She uses many colored threads in the embroideries and sometimes repeats a color. When I sew the embroidery, I do not have a backing in the hoop. I heavily starch the fabric and add batting. I first sew a tracing line around the hoop. It outlines the pattern. Then, after the embroidery is finished, I add the backing and use the line to add the first border. It makes a straight line and automatically centers the embroidery. I usually have two borders and stitch a feather stitch on the seam lines. This attaches the top to the backing. The binding is cut smaller than the binding for a large quilt. I like to hand tack the binding down. On some small quilts, I add a flange binding. It requires no hand work as it is sewn to the back of the quilt and turned to the front. These little quilts ( 12″ X 12″) are almost instant gratification.
