
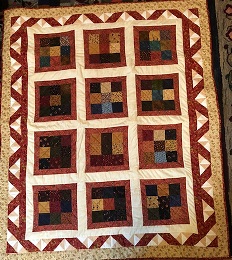
It is such a good feeling to finish a UFO. This one has been hanging around for a long time. It is a block of the month by Leah Day. I liked it because each block was made separately and machine quilted before putting the twelve blocks together. Leah Day, not only provided the pattern for the block, but also provided the quilting pattern. Her quilt was made with orange and yellow fabric. I did change the colors.

I was unhappy with the way that the blocks looked when I put them together. Something didn’t look right. I was using Georgia Bonsteel’s method of lap quilting to join the blocks.
ne night, I took all the seams out and started over using Leah Day’s method. When I un-sewed, I found out that I didn’t line the right seams up. No wonder it didn’t look right. Leah Day’s method sewed three lines around the block before squaring up the block. It seemed like an unnecessary waste of time, but it was well worth the extra effort in the end. The blocks were perfectly square and went together perfectly. Things that I have learned while making this quilt. Finished is better than perfect. Don’t quilt on cling wrap. It is hard to get off and threads pull out when it is removed. It turns black, probably from the ink used to draw the quilting lines. If it doesn’t look right, it probably isn’t. Don’t be afraid to un-sew and start again. Not all quilts need a border. Make the backing compatible in color with the thread that you are quilting with. It’s o.k. to change the quilting thread color within a block. It is impossible to follow a predetermined quilting pattern. You have to concentrate in following a line, coordinating the pedal and your hands. That’s just too much to think about at the same time. If there are pebbles, quilt your own. Quilt straight line from point to point. Tie off and clip beginning and ends of quilting lines as they are quilted.. Don’t wait until all the quilting is finished. Make sure that the bobbin thread is brought to the top every time that you start a new quilting line. If you don’t, the bobbin thread will be in a nest on the back. Don’t be in a hurry to finish a piece and go on to something else. Maybe there is a reason why you have a UFO in the first place.
After all this, it is a pretty quilt and it will keep someone warm.
Have a great day and happy quilting.

 The three cousins had visited Miss Molly in Maine last summer. They had a good time, except that Odie took over Miss Molly’s spot of the sofa.
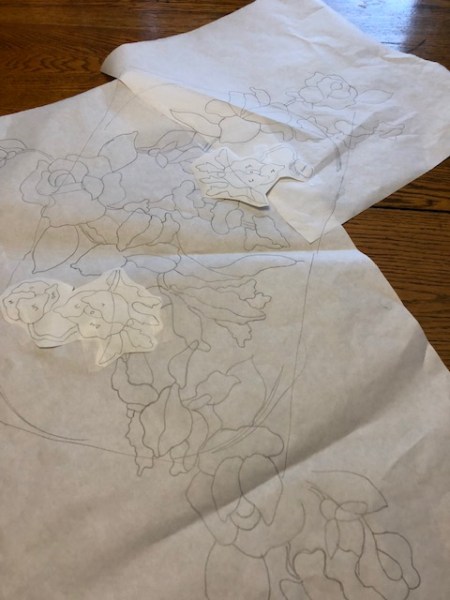
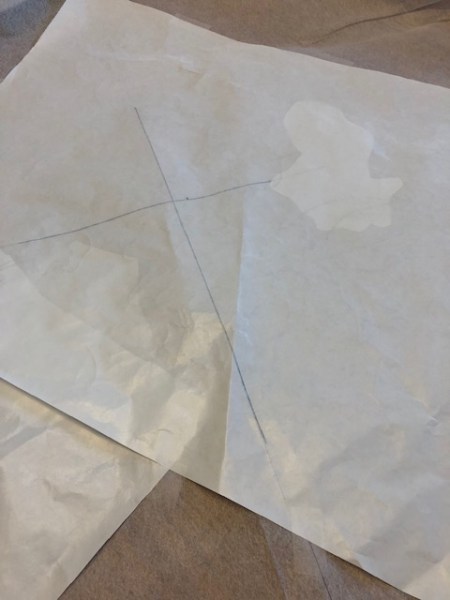
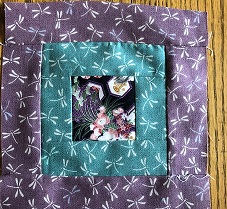
 Then, using the light box, I transferred the pattern to a large piece of stabilizer. This stabilizer pattern will be the diagram for placement of the applique pieces. The hardest part is figuring out which pieces should be appliqued first. The freezer paper diagram will be cut out for the patterns. I haven’t decided whether I will cut out and applique each flower separately or cut out and number all of them.
  I want to use the flowers from my garden for color inspiration. Several photos are in the file and I placed them where they should go so that I can see how it should look. I may look in a flower catalogue for other color inspiration. My flowers are very similar in color. I’m still deciding which fabric will be the base for the appliques. There are two contenders.
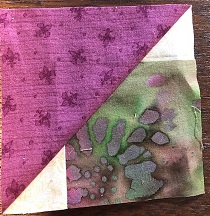
 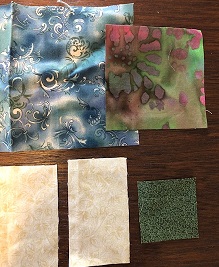 1 -3 1/2″ dark medium square, 1 – 2″ square of dark medium, 2 – 2″ x 3 1/2″ of light and 1 – 5″ square of dark medium.
Stitch together with a 1/4″ seam like this.
1 -3 1/2″ dark medium square, 1 – 2″ square of dark medium, 2 – 2″ x 3 1/2″ of light and 1 – 5″ square of dark medium.
Stitch together with a 1/4″ seam like this.

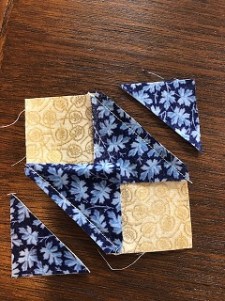
 Draw a diagonal line on the 5″ block.
Place onto the pieced block RST with the diagonal line beginning and ending on the light rectangles. Stitch 1/4″ on each side of the diagonal line. I pinned the two pieces together so that they wouldn’t shift.
Cut on the diagonal line to create two squares. Square to 4 1/2″ There is just a sliver to cut off.
Draw a diagonal line on the 5″ block.
Place onto the pieced block RST with the diagonal line beginning and ending on the light rectangles. Stitch 1/4″ on each side of the diagonal line. I pinned the two pieces together so that they wouldn’t shift.
Cut on the diagonal line to create two squares. Square to 4 1/2″ There is just a sliver to cut off. One square will look like this.
The other will look like this.
One square will look like this.
The other will look like this.
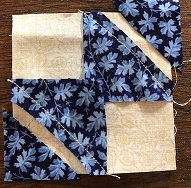
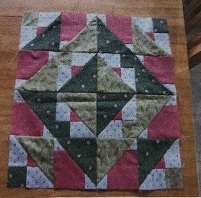 Assemble to create a pleasing design. Use lots of scraps for a different look. You can use charm squares for the 5″ pieces.
The picture of the square has 16 – 4″ pieces. I found that if you want a block that is color coordinated like the one in the picture, you have to make four squares in two different colorways.
An other possibility would be to make a 4 patch block with the pieces twisted and turned other ways. The blocks are so easy to make. It would be fun to make several and play with a setting. I do have a lot of 2″ off white strips leftover from another project. If the background was the same color, it might work.
Have a great day and happy quilting.
Assemble to create a pleasing design. Use lots of scraps for a different look. You can use charm squares for the 5″ pieces.
The picture of the square has 16 – 4″ pieces. I found that if you want a block that is color coordinated like the one in the picture, you have to make four squares in two different colorways.
An other possibility would be to make a 4 patch block with the pieces twisted and turned other ways. The blocks are so easy to make. It would be fun to make several and play with a setting. I do have a lot of 2″ off white strips leftover from another project. If the background was the same color, it might work.
Have a great day and happy quilting.


 I saw a beautiful quilt on the Missouri Star Quilt Company web site. It was a simple nine patch that was cut and the pieces turned in a different direction. It was different than the other blocks that I had made. The nine patches were set without sashing. I decided to make half size blocks so that I could make another Linus quilt with the technique. Nine patches are easy. I didn’t need to look at the tutorial to make them. The nine patches sewed up quickly. Somehow, it didn’t look right. I went back to the tutorial to see how the nine patches were cut. That’s when I discovered my big mistake. Five of the pieces of the nine patch were supposed to be white. I used all dark and medium pieces. They would have made a very dark quilt. That’s when the quilt was named “The Mistake”. I decided to put white sashing between the blocks and add an unusual border to take the eye away from the center. It worked. It turned out to be a pretty quilt. Maybe I should rename it “Lemonade”.
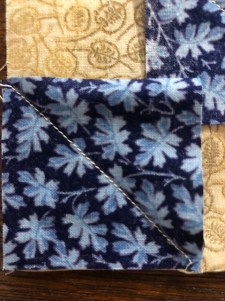
 Ann and Sue’s way is to cut the inner small square leaving the large square intact. No matter how accurate you sew, the triangle might be a little over or under the line. When you add this piece cut this way to another in the block, it will still be an accurate cut.

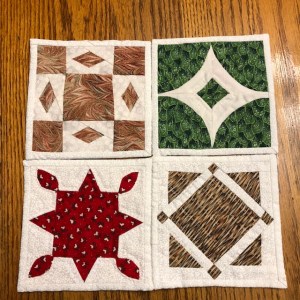
 Block 29 is a 6″ block. It is called Courthouse Step and was designed by Carrie Nelson. This was a quick block to make. There were only nine pieces and all straight sewing.
 Block 30 is an 18″ block. It is called Gaudi and was designed by Brigitte Heitland of Zen Chic. This took a little longer to piece than block 29. The triangle pieces were pieced in strip sets and then trimmed to the triangle. The center was a square in a square unit. The measurements in the instructions were not right, but I was able to adjust and make the center unit the right size. It called for 2″ squares to flip and sew on a 3 1/2″ base, when it meant to add triangles to all four sides of the center 3 1/2″ square. If I had followed the instructions, the center would have finished at 3 1/2″square. It needed to be 4 3/4″ which is the same size as the ends of the larger cross pieces.
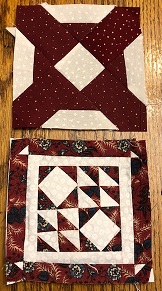

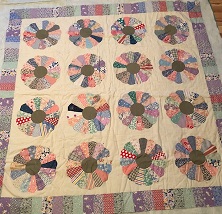 A friend gave me some Dresden Plate blocks that were made in the 30’s or 40’s. They came with the muslin. I have appliqued the blocks onto the muslin and stitched the blocks together.
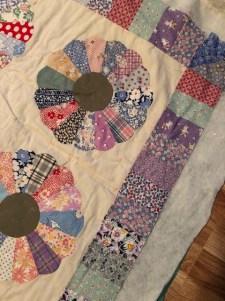 Fortunately, I had several 30’s Dresden Plates pieces that I purchased at auction several years ago. I was able to cut them to make the border. The fabric, even though it isn’t the same patterns, has the same look. It goes very well with the blocks.
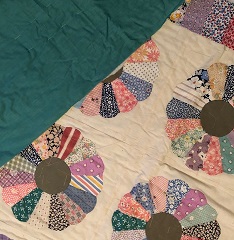 I bought a piece of green 30’s fabric from a vendor at the Guild quilt show, intending to use it for something else. It just happens to be the right size for the back of this quilt. I think that I was going to use it with the auction Dresden Plate pieces. They’re both in this quilt now so I don’t have to think of what to do with them.
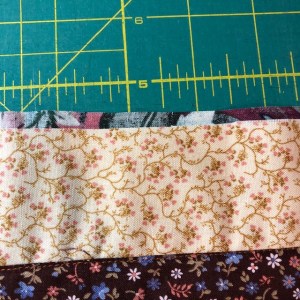
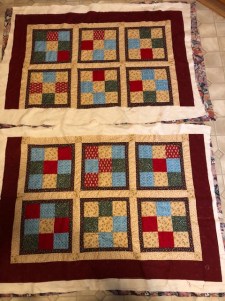 I’m using a Linus quilt for the demo. It is made with nine patch blocks set three by four. I made two sections of two rows. The nine patches are quilted. I omitted quilting the sashing because I needed it to float. I also didn’t quilt the border because The quilting might not match up where it was seamed. I wanted to quilt it all at once. Most tutorials tell you to trim both edges even. This will work, but you sometimes have to pull it and the seam won’t lay flat. I find it better to make one edge 1/4″ wider to give a little wiggle room. It is less stressful. On this quilt, the side with the sashing will be the side that is longer. It was not quilted. That will give you more room to manipulate. It is the bottom piece in the picture.
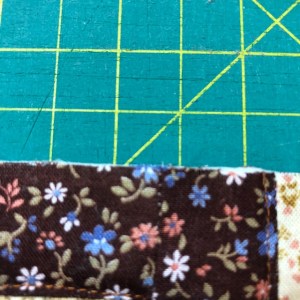
 Turn the bottom piece with the sashing over. Pin the backing down and away from the edge. This will keep it out of the way of trimming. Turn back over and trim even with the edge.
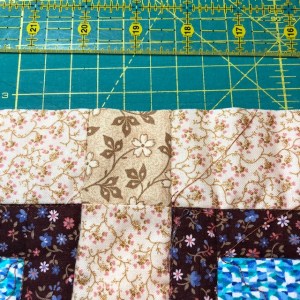
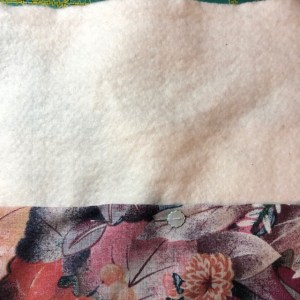
 Unpin the back, smooth out, and trim back 1/4″ away from trimmed top.
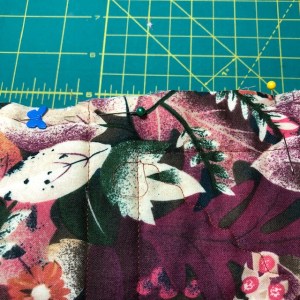 Pin backing down again to get it out of the way. Pin the two pieces together, right sides together. I use a lot of pins. Line up the sashing lines while pinning. Peek to see if they line up.
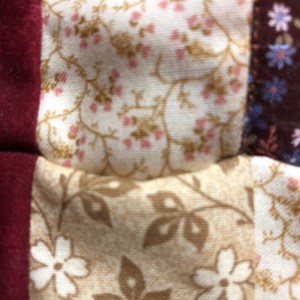
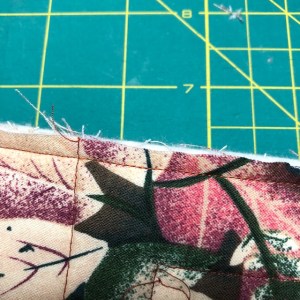 Then sew seam with a 1/4″ seam.
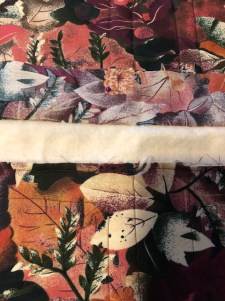 Take it to an ironing board. Laying it with top against the board, press seam up. Press 1/4″ on backing.
 When it is even, pin and then hand tack seam.
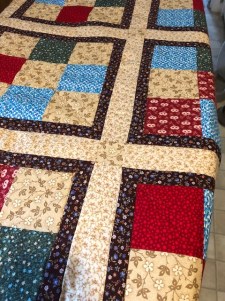 Done. You will not know that the quilt was quilted in small pieces. Using this technique, you can machine a king size quilt without a lot of tugging. You could even quilt single blocks and put them together this way. A patterned backing will hide the seams on the back. Or you could use different fabrics on the back and have a two sided quilt. There are so many options.