
 What a difference a day makes. I unsewed the parts to the star points on last week’s Moda Blockhead 2 block. I realized that I had omitted the step to trim the parts. After they were trimmed, they went together as they should. I did find the missing star point. It was under the sewing machine. All’s well that ends well.
The Kimberly Einmo Blockbuster quilt top is finished. It consists of the last ten 10″ blocks. I made four of one of the blocks for the corners, for a total of thirteen blocks. It is too large for me to quilt, so it will go to a longarm quilter.
I found a backing for the small “squirrel” quilt that I made from a picture. Now that the piecing is finished, I can quilt it. Maybe hand quilting because it is small. The star blocks are 4″ square. 
This is the pile of finished flying geese in the Temperature quilt. I need the black sashing strips to join the strips together. The black fabric is in New Hampshire. I’ll get it the next time that I go there. 
The International Quilters, two from the United States and two from Canada, who meet every year at the Vermont quilt Festival, have decided to sew a five yard challenge. We all have the same pattern to follow. I was checking out patterns to place in the focus 6″ square when I came across a pattern that I received at a Jennie Haskins seminar. It is the perfect item for the quilt show raffle. I can embellish it a little to make it special. Maybe I will start it tomorrow. Or I could work on Dear Jane, this week’s Moda Blockhead or the Simple Sampler block which will be in an e-mail tomorrow. Tomorrow will be a fun day. The dining room table is still neat and tidy.
Have a great day and happy quilting.
 In past years, my daughter came to Maine several times for a week in the summer. We called it “Quilt Camp”. We quilted. We went to yard sales, flea markets and consignment stores. Whatever we wanted to do. We had a great time. One year we sun dyed fabric in the back yard. The fabric was beautiful. Ferns and other items were imprinted on the fabric. A few years after we sun dyed, I made a quilt with the fabric and gave it to her. It is a good memory of our special time together.
 Melissa is finished. It is a good feeling to finish a project. I have so many long term projects that never seem to be completed. Most are one block a week (Moda Blockhead 2 and Simple Sampler) or one flying geese a day ( the Temperature quilt). Then there is Dear Jane. She just plods along when I feel like working on her. I have several quilts that are basted and ready to quilt. Also, a few UFOs that I intended to finish this summer. I really should concentrate on one quilt and get it done.
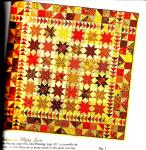 I haven’t talked about Miss Rosie for a while. Today’s quilt is called Open Door. Kerry Nelson, the author of the Miss Rosie book , made her quilt with red, brown and yellow fabric.
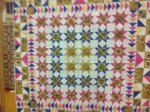 The center of my stars were cut from a fabric that I had bought for another project. The flower squares were the right size and there were enough of them to make the quilt. The flowers were different colors so I was able to put them in a medallion setting.
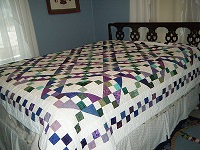
 My daughter’s quilt was made with red, blue and turquoise stars. All the fabric came from our stash, so we were able to make quilts with many colors.


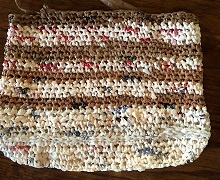
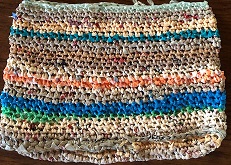
 Strips of plastic bags in balls
 Bags ready for linings.
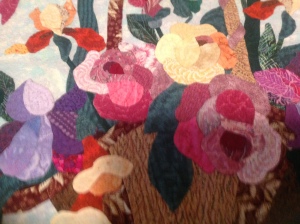
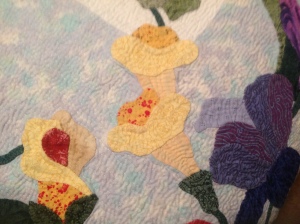
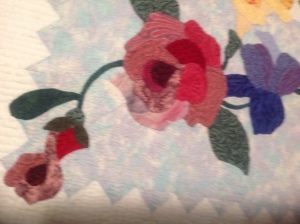
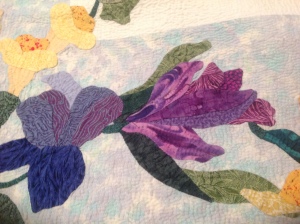
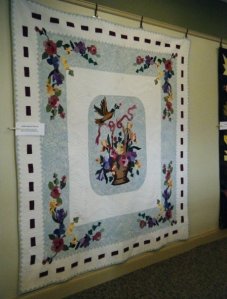 Basket and Butterflies is my favorite quilt. Many years ago, I took an applique class with Nancy Pearson at the Vermont Quilt Festival. I had taken classes with other applique instructors, but it wasn’t anything that excited me. The first half of the class was not about applique. It was about color and fabric choices. We cut and pasted fabrics onto paper. When we left class for lunch, several of the students were fussing and saying they didn’t sign up for that type of a class and were not going back. It was their loss as Nancy taught applique in the afternoon class. We had our background in color so the flowers were beautiful. Nancy taught us how to applique a twisted ribbon without having bulk at the joining. It was awesome and I was hooked on applique.
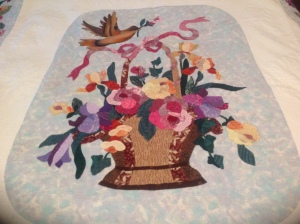 The center of Basket and Butterflies was the class project. I had enough wall hangings so decided to enlarge it and make a queen quilt. I designed a border using Nancy’s flowers and made a woven ribbon with the same colors as the ribbon on the basket.
 The quilt was named Basket and Butterflies because when I became bored with the stipple quilting, I quilted orange butterflies in the background, It is very subtle but makes a nice surprise when the viewer discovers the butterflies.
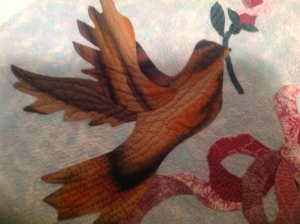


 I actually finished a UFO today This is a really old one. I think that I used the Lazy Girl flying geese ruler to make the flying geese. It makes four at a time. The piece is 20″ x 20″ and will go in the “give away” bin. It’s machine quilted so didn’t take long to finish. I used the leaf galore ruler to mark the curvy lines. The ruler was the exact length as the border so I didn’t have to add or subtract anything. I gave up on trying to finish a UFO every week. The small ones were easy to do, but the larger ones take more time. they’ve been sitting there for a while so they can sit a little longer.
 Last week’s Splendid Sampler block was designed by Rachael Daisy. It is called Around Four Corners. Quilters who write several of the blogs that I follow are doing the Splendid Sampler as well as the Moda Blockhead 2. They give tips about sewing the blocks. The tip for this block was to sew it exactly as the pattern says. That is reasonable. One of the reasons that I am making the Splendid Sampler blocks is to learn new techniques.


