I worked on a lot of different things today. The morning was spent quilting Melissa and adding the binding. As soon as that is sewn down, I’ll show a picture.

This afternoon, I went to my hand work box and added the top and bottom of row three of Dear Jane. I still have three blocks to applique, quilt and bind for the side pieces of that row. Then on to the fourth row.
The weather was nice so Miss Molly and I went out on the porch and sat on the swing. I sewed down the binding of the mile a minute table topper.
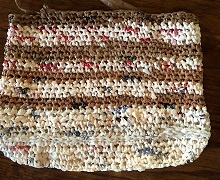
When it became dark, I came inside and crocheted a row on the plastic bag. I am doing much better with crocheting. Maybe it’s not so hard after all. I have some folding and organizing to do with the loads of plastic bags that I brought home with me yesterday. Then they will be ready to cut when I need them.
I need a small quilt for the raffle at the quilt show. I’ve been looking for a pattern and found a picture that I had saved. I’m not sure what the size of the quilt in the picture is, but I’m making it with 4″ blocks set on point. I cut out some of the pieces and will sew some together tomorrow.
I had some donated summer squash and zucchini. Also some cucumbers. I sautéed the summer squash with garlic and basil for supper tonight. It was delicious. I’ll have some zucchini tomorrow although I should shred some for the freezer. Chocolate zucchini bread would be delicious in the winter. My tomatoes are red, so I can have a salad with the cucumber and the lettuce that is in the refrigerator. Summer is wonderful with the fresh vegetables and fruit.
Have a great day and happy quilting.
 Strips of plastic bags in balls
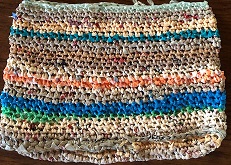
 Bags ready for linings.
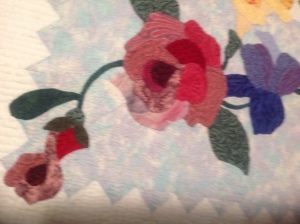
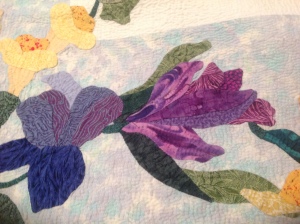
 Basket and Butterflies is my favorite quilt. Many years ago, I took an applique class with Nancy Pearson at the Vermont Quilt Festival. I had taken classes with other applique instructors, but it wasn’t anything that excited me. The first half of the class was not about applique. It was about color and fabric choices. We cut and pasted fabrics onto paper. When we left class for lunch, several of the students were fussing and saying they didn’t sign up for that type of a class and were not going back. It was their loss as Nancy taught applique in the afternoon class. We had our background in color so the flowers were beautiful. Nancy taught us how to applique a twisted ribbon without having bulk at the joining. It was awesome and I was hooked on applique.
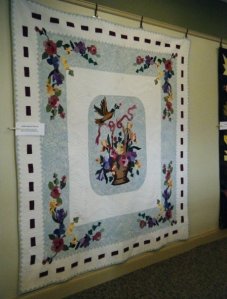
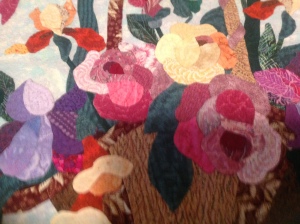
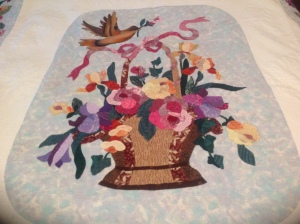 The center of Basket and Butterflies was the class project. I had enough wall hangings so decided to enlarge it and make a queen quilt. I designed a border using Nancy’s flowers and made a woven ribbon with the same colors as the ribbon on the basket.
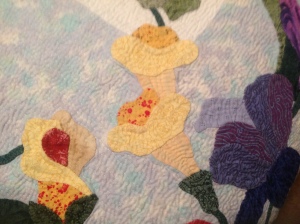
 The quilt was named Basket and Butterflies because when I became bored with the stipple quilting, I quilted orange butterflies in the background, It is very subtle but makes a nice surprise when the viewer discovers the butterflies.
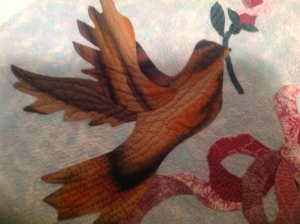


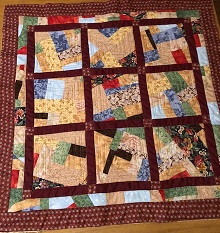
 I actually finished a UFO today This is a really old one. I think that I used the Lazy Girl flying geese ruler to make the flying geese. It makes four at a time. The piece is 20″ x 20″ and will go in the “give away” bin. It’s machine quilted so didn’t take long to finish. I used the leaf galore ruler to mark the curvy lines. The ruler was the exact length as the border so I didn’t have to add or subtract anything. I gave up on trying to finish a UFO every week. The small ones were easy to do, but the larger ones take more time. they’ve been sitting there for a while so they can sit a little longer.
 Last week’s Splendid Sampler block was designed by Rachael Daisy. It is called Around Four Corners. Quilters who write several of the blogs that I follow are doing the Splendid Sampler as well as the Moda Blockhead 2. They give tips about sewing the blocks. The tip for this block was to sew it exactly as the pattern says. That is reasonable. One of the reasons that I am making the Splendid Sampler blocks is to learn new techniques.


 Place the two pieces of fabric together, right sides together. Place batting under the fabric and sew around the edge with a 1/4″ seam. Leave a 3″ to 4″ opening so that you can turn the piece right side out.
 Trim the batting and the corners before turning the piece right side out. Press carefully. Topstitch the edge, sewing up the opening. Quilt the piece. You could practice free motion quilting or quilt in straight lines. I added piping to the edges of this basket to see if I would like it. It does add another element, but does take longer to make.
 Fold the piece in half. Measure and mark 2″ on the fold and up the edge. Draw a line between the two marks. When sewing on the line, back stitch to lock stitches in place. The 2″ mark is for a 12″ piece. You would mark a smaller triangle for a smaller piece. The measurement is how tall the basket will be. You might want some baskets taller and more thin or some shorter and fatter.
 Before you turn the basket right side out, tack the points down, all going in the same direction.
 Turn the basket right side out. Fold down and tack the points with a button, sewing completely through the basket and point.


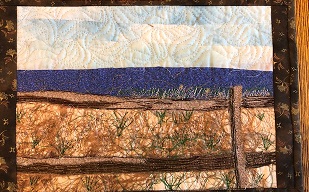
 I decided to make an underwater scene with cut out fish from a leftover scrap. A peacock feather became a piece of coral. I did some thread painting and it turned out very nice. After I made the underwater scene, I wondered if I could make a landscape out of the tiny bits and pieces of fabric that should have been thrown away. When I was working, I had several photos taped to my work station. They were of places that I had been and enjoyed. Maybe I could use the photos and commit the scenes to fabric. The scenes were small so the first thing that I did was enlarge them to 8″ by 11′. It seemed the perfect size for a small wall hanging.
 The first one that I made was terrible, It was a mountain scene in N. H. I had written a mission statement before I started the Gaa-barge project and it stated that no matter how bad a piece was, it would remain in the project. This one is still with the others, mainly to remind me that not all quilts are successful. Some are really, really bad.